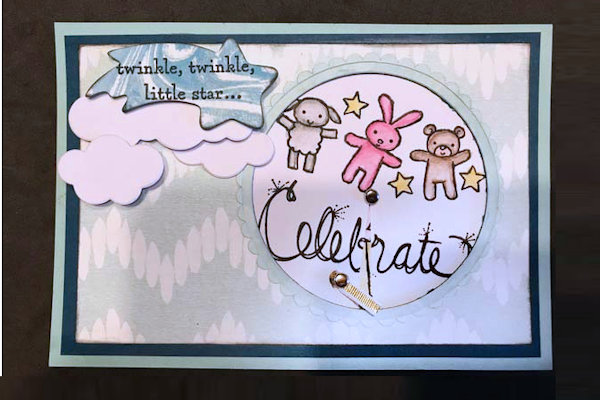
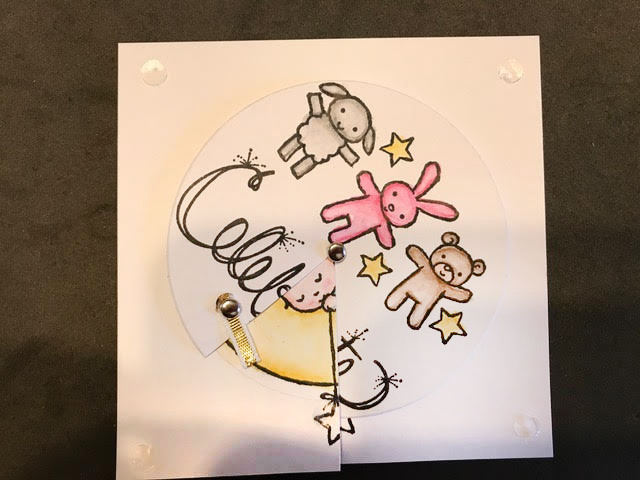
Magic Reveal Spinner Card
by Tanya de Roy
Spin a panel on this card to reveal a hidden image or sentiment.
Supplies
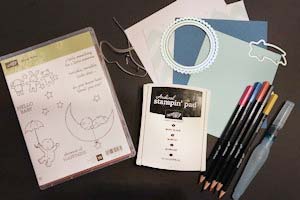
- Cardstock (Stampin’ Up!® Sweet Sugarplum, Very Vanilla, and Sahara Sand cardstock used here)
- Copy paper
- Ink (SU Basic Black Archival ink used here)
- Stamps (SU Love Sparkles and Moon Baby sets used here)
- Coloring medium of your choice (watercolor pencils used here)
- Circle dies (Layering Circles Framelits Dies used here)
- Piercing tool
- Scissors
- Metal brads
- Ribbon (1/4” Natural Trim Silver used here)
- Adhesive (Scotch tape, foam adhesive, glue dots, and Tombow Mono Multipurpose Glue used here)
- Other supplies as needed to complete the project (used here: Designer Series Paper Stack 2016-2018 In Colour, heat tool, Aqua Painter)
Step-by-Step
-
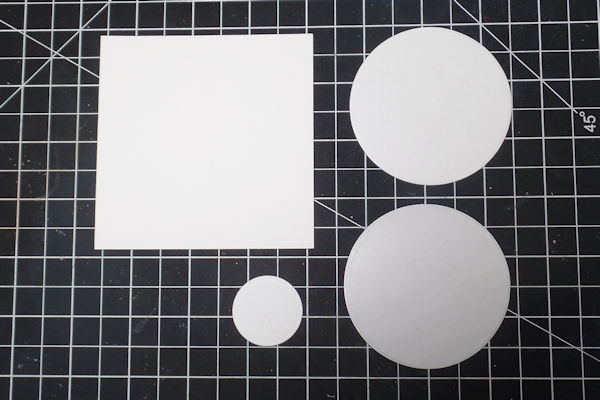
Step 1
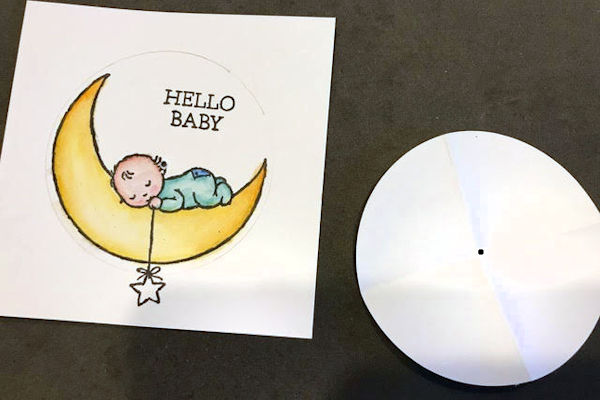
Cut a 3 3/4” square and a 3” circle from white or cream cardstock.
Punch a 1” circle from the same cardstock.
Cut a 3” circle out of copy paper.
-
Step 2
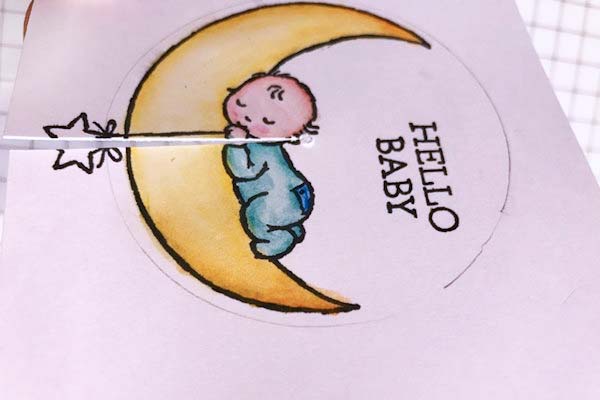
Stamp and color coordinating images on the square and the circle of white or cream cardstock. The hidden image will be on the cardstock circle.
-
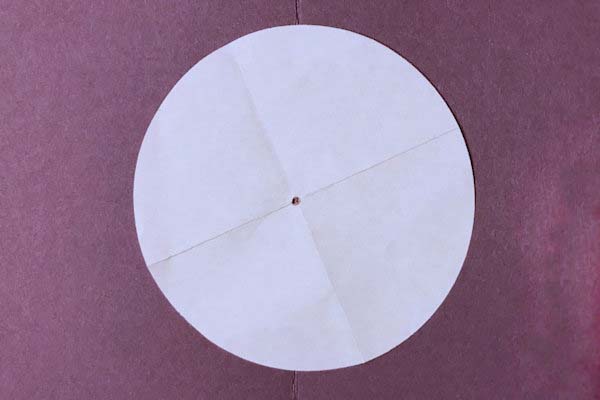
Step 3
Fold the paper circle in quarters to find the exact center. Place this over the top of the stamped cardstock circle as a template, and pierce a hole in the center of the circle with a piercing tool.
Also, pierce a hole in the center of the 1” circle (this doesn’t need to be exact). -
Step 4
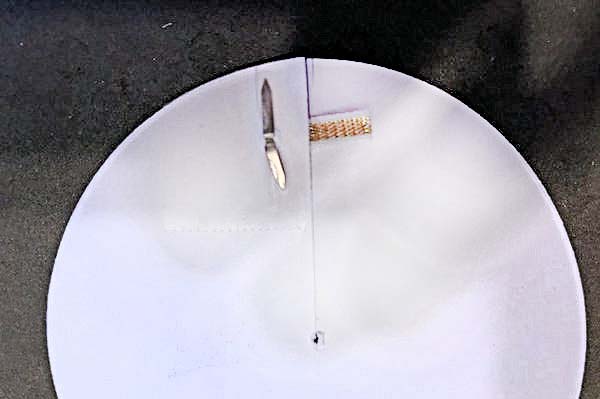
Cut a line with scissors directly from the bottom of the cardstock circle to the pierced hole.
-
Step 5
Pierce a hole in the center of the square stamped piece, using the template as a guide.
-
Cut a line from the pierced hole directly down to the bottom of the square.
-
Step 6
On the stamped circle piece, pierce a hole approximately 1/2” from the bottom of the circle and 1/2” to the left of the slit.
Attach a small section of folded ribbon (approximately 1 1/2”) with a small metal brad.
Open and position the prongs of the brad so that they don’t show from the front, and cover them with tape to keep them in place. -
Step 7
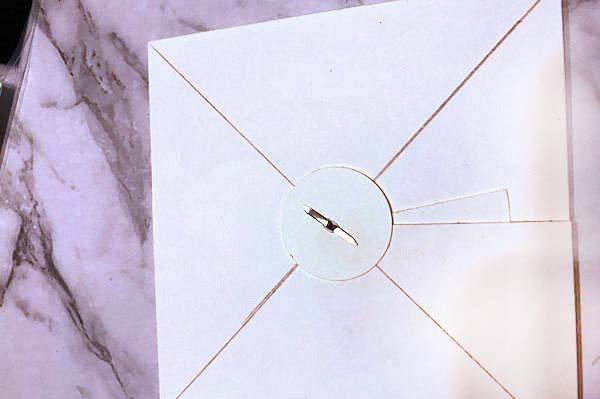
Place a metal brad through the large stamped circle, then the square stamped piece, then the 1” circle. Open out the prongs of the brad to secure it.
Place the right side of the slit on the large circle under the left slit of the square. Place a small glue dot just to the left of the square slit as shown. -
Step 8
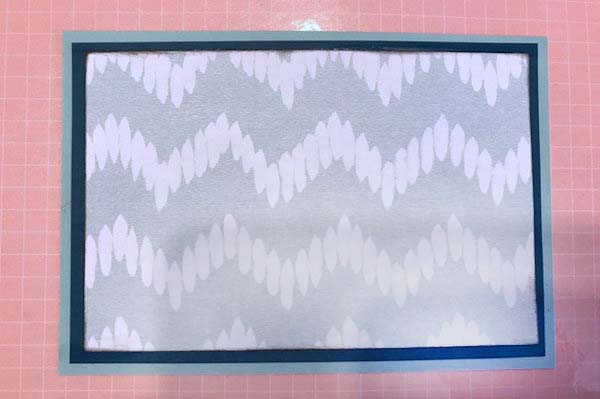
To construct the card, attach patterned paper (5” X 3 3/4”) to a cardstock mat piece (5 1/4” X 4”).
-
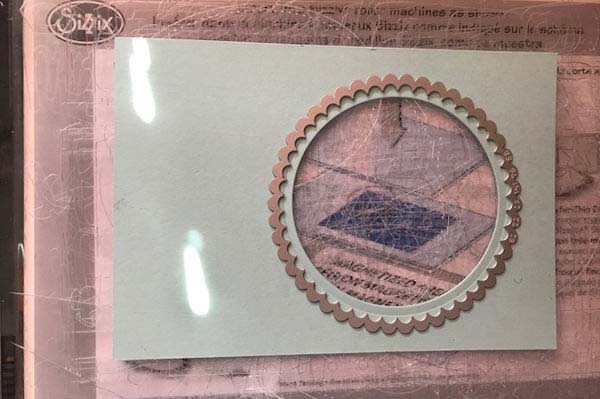
Cut a circle measuring 2 1/2” from the card base. Center it on the right of the card front, making sure it is even on three sides.
-
Step 9
Place some glue on all four corners of your mechanism piece. Attach this to your card front directly under your circle opening.
-
Step 10
Cut a card base measuring 8 1/2” x 5 1/2”. Score on the long side at 4 1/4” and fold.
-
Place foam adhesive around the back of your card front. Attach it to the card base.
-
Step 11
Finish off the card by adding a frame around the circle. In the sample, Layering Circle Framelits were used to create a perfectly fitting frame.
-
Step 12
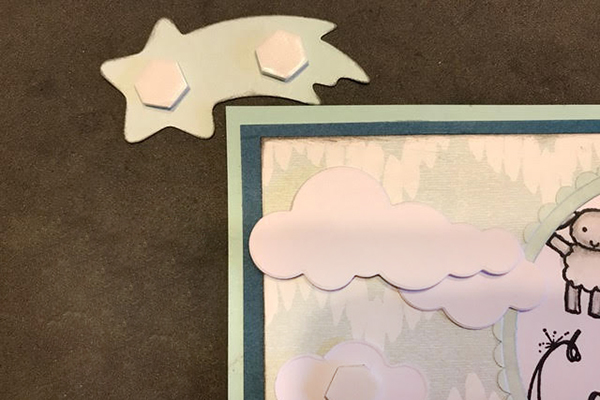
Embellish the card front as desired.
-
Step 13
Complete the project.
-
The finished card will fit in a standard A2 envelope.


Video!
Your Turn
You've seen the tutorial, now you try it! We've got a section of the gallery set aside for Magic Reveal Spinner Card. Try this technique, then upload your artwork to the gallery. Show us your creations!
***Please note - Internet Explorer/Edge is not a supported browser, and will not allow you to see the videos. Please use Chrome, Firefox or Safari to view our tutorial videos.

Questions and Comments
We'd love to get your feedback or questions. Leave your comment below.
I was very easy to follow and fun to make.
Page 1 of 1 pages