Milk Carton Box
by Beate Johns
Treat boxes are easy to create with a few scores and cuts.
Supplies

- 7" x 11" piece of cardstock
- Sticky Strip™ or other strong adhesive
- Paper cutter with scoring blade
- Stylus tool
- Ruler
- Bone Folder optional
- Scissors
- Stamps
- Ink
- Additional cardstock and embellishments to decorate your carton
Step-by-Step
-
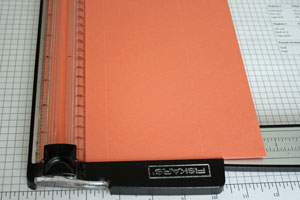
Step 1
Score at 2", 5" and 6 1/2" on the short side of the cardstock.
-
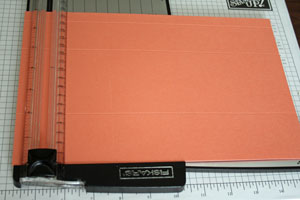
Step 2
Turn cardstock 90 degrees and score at 2 1/2", 5", 7 1/2" and 10" on the long side of the cardstock.
-
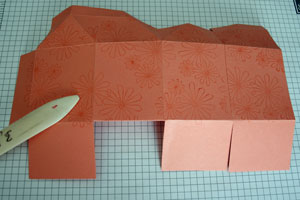
Step 3
Arrange cardstock with the long side at the bottom of the work surface.
Now cut on vertical scores lines ( 2 1/2", 5", 7 1/2" and 10") up to the first horizontal score lines.
This will make the bottom of the box.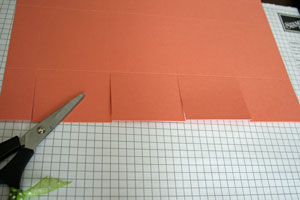
-
Step 4
Cut part of the 1" scored strip on the left hand side, leaving only the 3" piece to create a glue tab for the sides of the box.
On the top of the box, cut the third panel of the 1/2" x 2 1/2" rectangles off as pictured. This will be the milk carton spout.
-
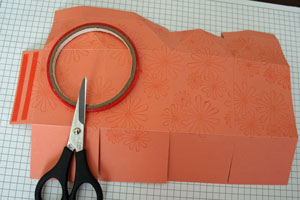
Step 5
On the remaining three 1/2" x 2 1/2" panels, use a stylus and ruler to add a score down the middle of each panel.
-
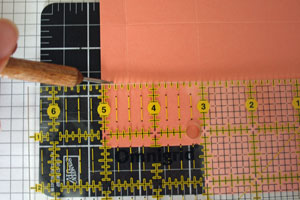
Step 6
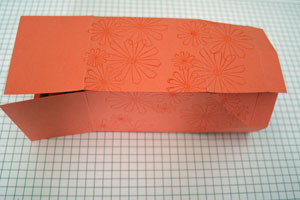
Use ruler and stylus to add diagonal score lines to the box as shown.
The lines have been traced with a marker on the back side of the cardstock here.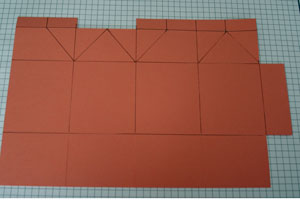
-
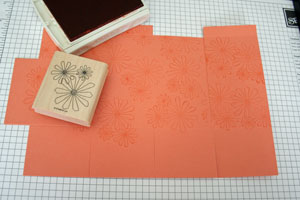
Step 7 (Optional)
Stamp cardstock.
-
Step 8
Use bone folder to pre-fold all score lines, including the diagonal ones.
-
Step 9
Add Sticky Strip™ to your glue tab.
-
Step 9
Add Sticky Strip™ to the glue tab.
-
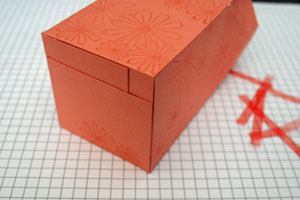
Step 10
Adhere the glue tab inside to the other wall to form the box.
-
Step 11
Fold the bottom flaps in one at a time and add Sticky Strip™ to the last two flaps to close the box.
-
Step 12
Add Sticky Strip™ to the back half of the 1/2" panels at the top to hold the milk carton closed.
Now finish the box by adding embellishments.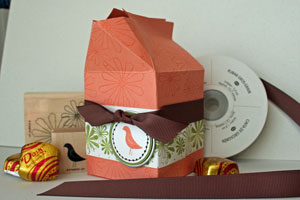
Your Turn
You've seen the tutorial, now you try it! We've got a section of the gallery set aside for Milk Carton Box. Try this technique, then upload your artwork to the gallery. Show us your creations!
***Please note - Internet Explorer/Edge is not a supported browser, and will not allow you to see the videos. Please use Chrome, Firefox or Safari to view our tutorial videos.
Questions and Comments
We'd love to get your feedback or questions. Leave your comment below.
Your tutorials are always so amazing!! Thanks for sharing this one in time for Valentine's Day...love it!!
With valentines day just around the corner it will be another I will have to try.
Awesome tutorial!!!!
me how you come up with these tutorials.
You are the bomb. Barb
thanks for the great job on the template, and the generosity to share it!
Here's what I did....5 1/2 x 11 piece of paper. On short side scored at 1 1/2, 3 1/2 and 5. On long side- scored at same places as 7X11 version. Followed rest of directions as 7X11.
I think it turned out too cute! Bonus....2 boxes out of a 12X12!!!
Page 1 of 2 pages 1 2 >