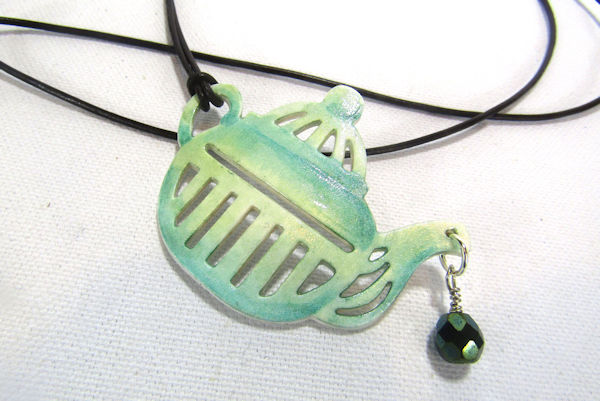
Paper Pendants
by Dina Kowal
Layer watercolor paper to create this sturdy charm or embellishment.
Supplies
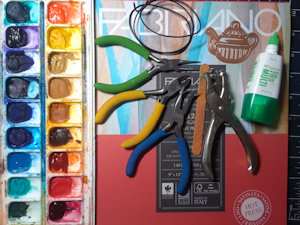
- Heavy watercolor paper (Fabriano Studio Hot Press 140# paper used here)
- Shaped die (Spellbinders Shapeabilities Tea Pots Etched Dies used here)
- Liquid glue or matte gel medium (Tombow MONO Multi Liquid Glue used here)
- Coloring medium (QoR watercolors and Polychromos colored pencils used here)
- 1/16” hole punch
- Nail file
- Clear varnish or acrylic glaze (Sculpey Gloss Glaze used here)
- Jump rings, wire and beads (7mm ring, and 8 mm glass bead used here)
- Jewelry pliers
- 36” cording (1.5mm black round leather cord used here)
Step-by-Step
-
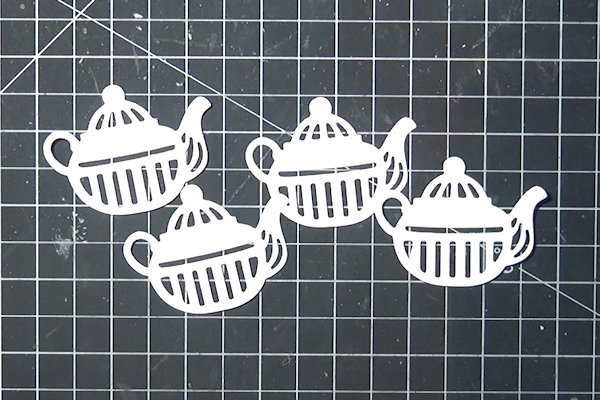
Step 1
Die cut 3 to 4 images from heavy watercolor paper.
-
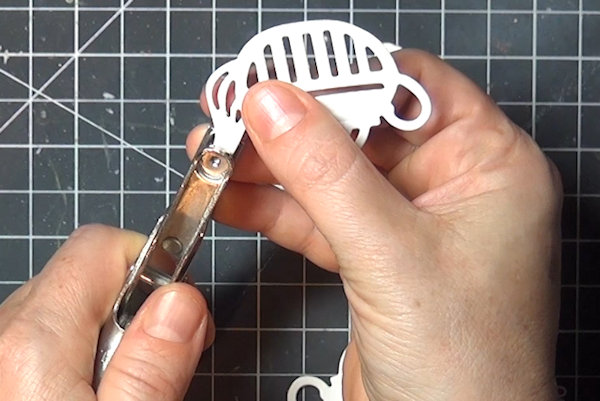
Step 2
If the image does not have a hole suitable for a jump ring, punch one using a 1/16” punch. Punch one piece at a time, using the first punched hole as a template for the other pieces.
-
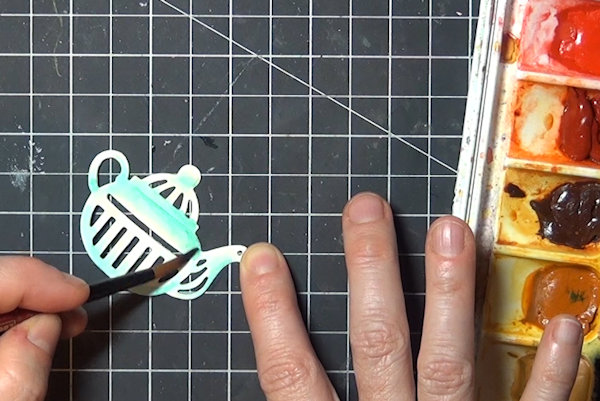
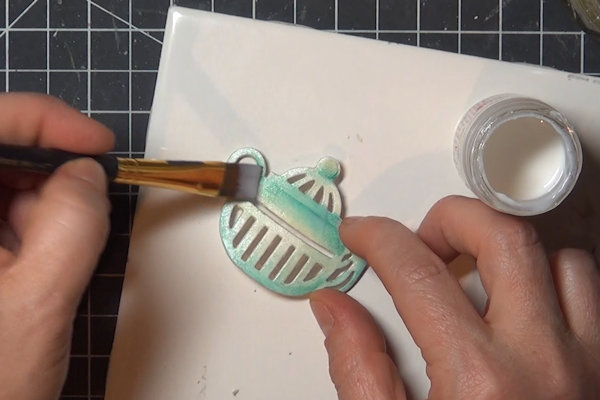
Step 3
Color one of the die cut pieces (watercolors were used here - try other mediums as well!).
-
-
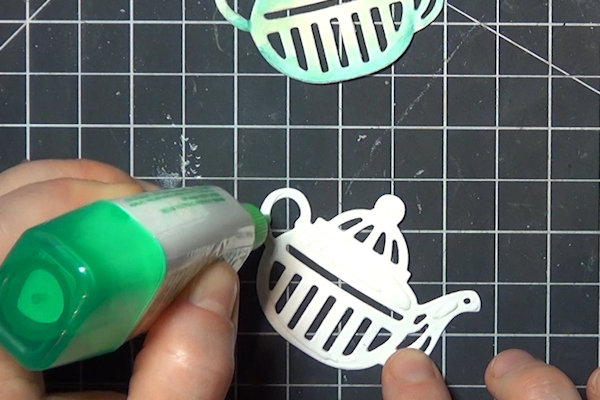
Step 4
Using a liquid glue or matte gel medium, adhere the die cut pieces together in a stack.
-
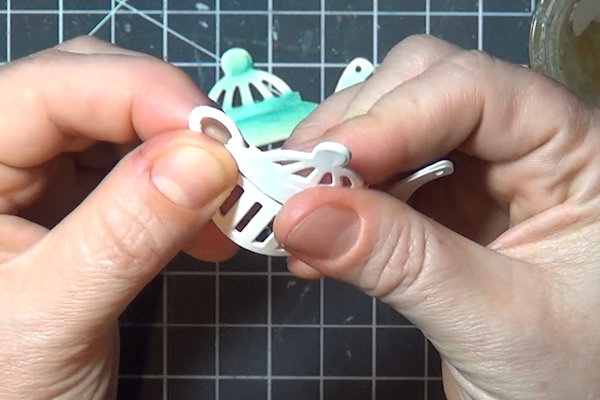
While the glue is wet, curve the piece slightly.
-
Step 5
NOTE:
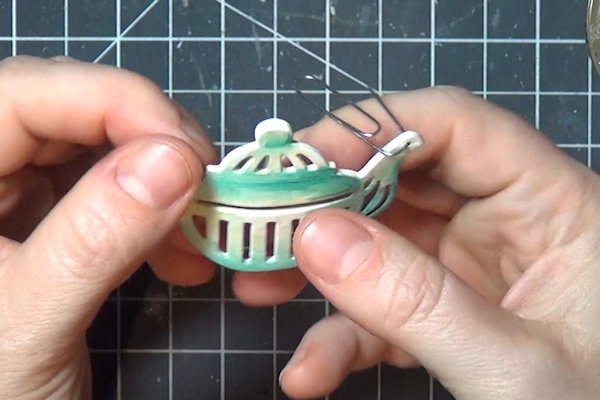
If you have punched holes that need to stay aligned, make sure they do not shift during the shaping. Use a skewer or wire to keep the holes in place (a paper clip was used here).
Allow the glue to dry completely. -
Step 6
Use a nail file to smooth the edges of the piece.
-
Step 7
Give the piece several coats of varnish or clear glaze, allowing each layer to dry before applying another.
NOTE:
If there are holes in your image, take care to remove excess glaze that may collect there. -
Step 8
Run a jump ring through the hole to create a pendant.
-
Embellish as desired.
-
Step 9
Attach a cord, chain, or other fitting to the piece.
-
Step 10
Complete the project.


Video!
Your Turn
You've seen the tutorial, now you try it! We've got a section of the gallery set aside for Paper Pendants. Try this technique, then upload your artwork to the gallery. Show us your creations!
***Please note - Internet Explorer/Edge is not a supported browser, and will not allow you to see the videos. Please use Chrome, Firefox or Safari to view our tutorial videos.

Questions and Comments
We'd love to get your feedback or questions. Leave your comment below.
This is adorable and wonderful! I am an avid tea drinking as is one of my closest friends...I would LOVE to know where this specific teapot cut out came from? If you can...lol. Would love to make a matching set using different colors for my friend and I :D
Either way, thank you so much for the tut! I will be making a bunch of things using your lesson!
Page 1 of 1 pages