Serigraph
by Beate Johns
Make a colorful background with your rubber brayer and three or four coordinating colors.
Supplies
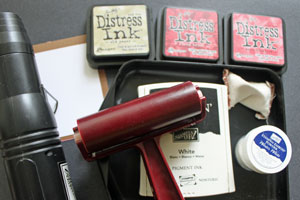
- 3 or 4 coordinating colors of waterbased inks
- Rubber Brayer
- White Embossing Powder
- Embossing Buddy™ (you can use a new swiffer cloth or a dryer sheet too)
- Heat Gun
- VersaMark™, or white pigment ink
- White cardstock
- Stamps, Verve's Happiness Found used here
Step-by-Step
-
Step 1
Ink up your brayer with the lightest colored ink and brayer over some parts of your white cardstock.
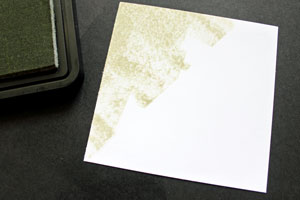
-
Leave spaces white.
-
Step 2
Take your second color and repeat step one.
-
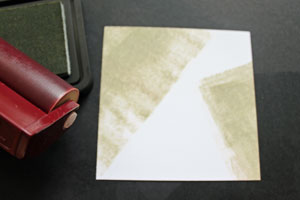
Step 3
Rub the whole sheet of cardstock with your embossing buddy™ or dryer sheet to keep stray embossing powder from sticking to the rest of the paper.
-
Step 4
Stamp your image randomly in VersaMark™, or as shown here with white pigment ink.
-
Step 5
Pour the embossing powder over the images. Tap off excess.
-
Heat it.
-
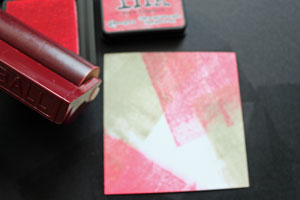
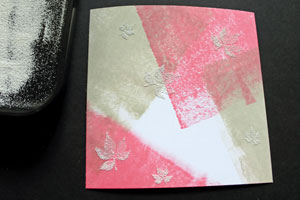
Step 6
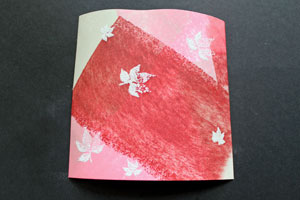
Brayer over your cardstock with your darkest color.
-
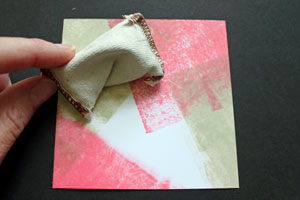
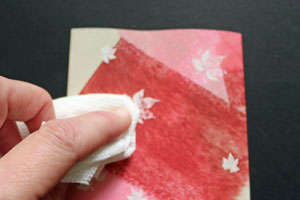
Step 7
Take a paper towel and buff over your embossed images to take away ink that was brayered over them.
-
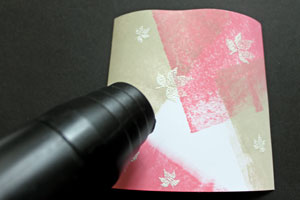
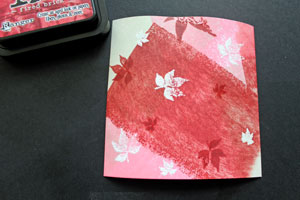
Step 8
Stamp your image again, but this time with your darkest ink.
-
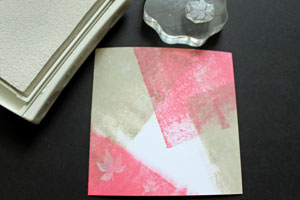
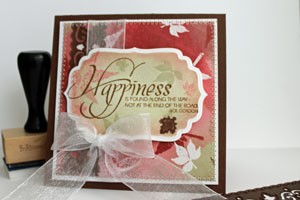
Step 9
Now finish your card. You can use the finished piece of cardstock as a background, or as a card itself.
Video!
Variations
Emboss it
Try embossing your greetings on the Serigraph background, or stamping on it in black.
Window Card
Cut it up and use it as a window panel.
Your Turn
You've seen the tutorial, now you try it! We've got a section of the gallery set aside for Serigraph. Try this technique, then upload your artwork to the gallery. Show us your creations!
***Please note - Internet Explorer/Edge is not a supported browser, and will not allow you to see the videos. Please use Chrome, Firefox or Safari to view our tutorial videos.
Questions and Comments
We'd love to get your feedback or questions. Leave your comment below.
I WOULD LIKE TO PRINT A LOGO ON SHELLS (500pieces)
HOW CAN I DO IT ?
thank you
caroline
Page 1 of 1 pages