Stamp Etching
by Lydia Fiedler
Use a fine-tipped black pen to give your stamped images the look of classical etchings.
Supplies
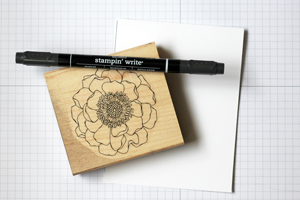
- Open line-art stamp image (Stampin' Up!'s Blended Bloom used here)
- Black marker or pen with a fine tip
- Cardstock (a smooth cardstock is best)
Step-by-Step
-
Step 1
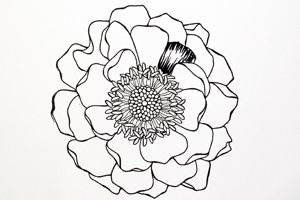
Begin by stamping an open line art stamp in black ink on smooth white cardstock.
-
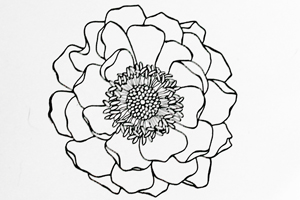
Step 2
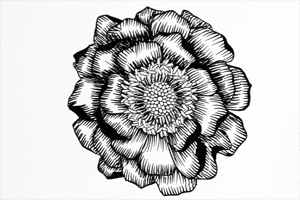
Using a fine-tipped marker, begin to make tapered lines within the stamp image with a light flicking motion - lifting the pen off the paper towards the end of your line. The line should be thinner at the end than it is where it started.
-
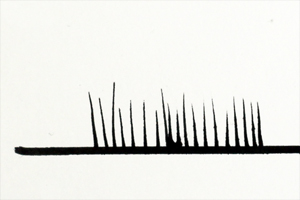
Practice by drawing a straight line on a scrap. Put your pen down on the line briefly and then as you draw a quick line, lift the tip of the pen up off the paper towards the end of the line.
-
Step 3
To add a little shading, do a second, shorter group of lines at the base of the first.
-
Step 4
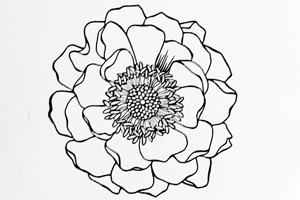
Continue until your image is completely filled.
-
Step 5
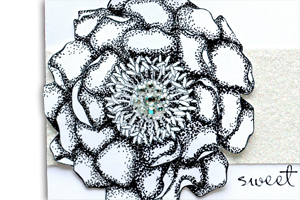
For variations on this technique, try cross-hatching...

-
or stippling.
-
Step 6
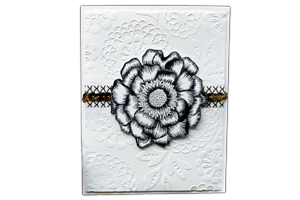
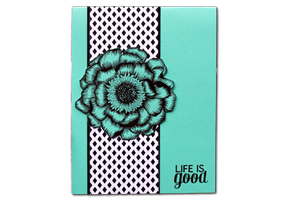
Use your image on a finished project.
-
Try this technique on colored cardstock, too.
Video!
Your Turn
You've seen the tutorial, now you try it! We've got a section of the gallery set aside for Stamp Etching. Try this technique, then upload your artwork to the gallery. Show us your creations!
***Please note - Internet Explorer/Edge is not a supported browser, and will not allow you to see the videos. Please use Chrome, Firefox or Safari to view our tutorial videos.

Questions and Comments
We'd love to get your feedback or questions. Leave your comment below.
Very inspiring!
Thanks!
@kab - I used the same motion on the crosshatching and I used the finer of the two Project Life pens from SU for that one - it has a finer tip than the Basic Black marker I used for the etching sample.
Page 1 of 3 pages 1 2 3 >