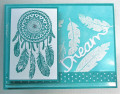
I chose the diagonal starting from the lower left that included: metallics, patterned paper, and easel card. My metallics and the patterned paper requirement were met using the My Minds Eye (MMD) gold dotted paper The metallics part of the challenge was also met by using gold embossed feathers. I made an easel card with an acetate window so my feathers could "float" in the easel.
The tutorial by Stars & Strips Operation Write Home Blog at http://www.owhstarsandstamps.org/201...asel-card.html is a great one for creating an easel card. My variation was that I lined up the main SU Blushing Bride panel (4.25"x 5.5") with the flap of the card base it was going to be attached to (while the card base was laid out flat unfolded), and ran it through my Big Shot with the circle die to create the window. This cut the circle so it crossed the fold line of the card base, so don't worry when yours gets cut that way. I think the cut across the fold adds interest and frames the opening when you look through the front and see the inside of the card.
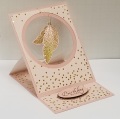
The front panel (4.25"x 5.5") is a beautiful dusty pink patterned paper with gold metallic dots from My Minds Eye "Fancy That" 6" paper stack. I die cut the circle on this piece using a slightly larger circle die so that the pink main panel would show through as a "mat". This piece of patterned paper was cut 4"x 5.25" to allow the pink to show all around the edges of the paper as a mat.
To assemble the front panel, first cut a piece of clear acetate slightly larger than the larger circle opening of the patterned paper, and glue it to the back of the paper (be sure no edge of acetate is extending beyond the sides of your patterned paper). Then, I glued this acetate backed patterned paper to the front of the pink main panel using Tombow glue. IT'S A GOOD IDEA TO "DRY FIT" ALL YOUR PIECES BEFORE GLUING TO INSURE A GOOD ALIGNMENT!
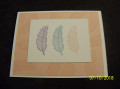
The feathers were stamped using Versamark clear embossing ink with the feathers from SU's 2014 "Four Feathers" stamp set. Two were stamped onto SU "Blushing Bride", and one of the smaller ones was stamped onto SU "Pink Pirouette" cardstock. All three feathers were dusted with SU detailed gold embossing powder, and heat set with a heat tool. They were then die cut using the matching SU dies "Feathers" Framelits Dies. Because the back of the feathers would be visible through the acetate window, I also die cut matching feathers on the BACK of the gold dotted patterned paper so they would be the reverse shape of my embossed feathers. Then I just flipped them over and glued them with Tombow glue to each of the embossed feathers.
The embossed feather were attached together using Mini Glue Dots, and a piece of gold sewing thread I had left over from a sewing project was tied around the top of the grouped feathers. This feather assemblage was then attached to the upper center of the acetate window using Mini Glue Dots.
The white inside of the card, which would be visible when the easel card was stood upright, was covered with a 4.25"x 5.5" panel of the SU "Blushing Bride" cardstock, then a 4"x 5.25" piece of the gold dotted patterned paper was glued on top of that.
The final step was to create the "bumper" which the opened easel would rest against to keep in standing up. This was created by die cutting the smallest scalloped oval from the SU "Layering Ovals" Framelits Dies as the mat, then stamping the birthday sentiment from the 2005 retired SU "Sincere Salutations" set onto a scrap of the pink cardstock I'd use on the main panel. The sentiment was stamped with Versafine Onyx Black ink because of the fine lines in the font used for the sentiment. The sentiment was then die cut with the smallest plain oval in the Framelits set, and attached to the scalloped oval using adhesive foam strips. This sentiment assemblage was then attached to the back panel of the card using adhesive foam strips to raise the sentiment up high enough to easy prevent the easel card front from slipping closed when it is stood up for display.
The most difficult part of the card was centering the dies to cut the matching circles... and for those of us who are "bow challenged" like I am, tying that darn fine thread into a bow was super tough! I think I tried it six times, if not more!!!
I am rating the difficulty level for this card as a "3" because of the care that has to be taken centering and die cutting the circles. It was fun to make, and certainly looks beautiful with all the shiny metallic elements!
Date: Friday, June 29, 2018 GMT Views: 1909
Favorited:3